 |
| May Book Blog: Serge With Confidence by Nancy Zieman |
First, place each organza piece to each batiste piece, wrong side of organza to right side of batiste, and baste around the edges to join.
Treat as one from this point on.
Change your serger setup to a three- or four-thread overlock stitch and finish the jacket edges along the front facings. Fold the facings to the right side of the garment along the foldline and stitch across the facings 3/4 inch from the top just to the end of the serged finish and 1-1/2 inches from the bottom across the facing.
Mark all the way around your neckline edge 1 inch from the shadow-stitching line.
Stitch up your side seams making sure to align the shadow stitching.
Finish with the serged edge. (You could serge only, but you run the risk of misaligning the shadow stitching).
Serge all the way around the bottom edge of the jacket (facings are still turned back.)
For many serged baby items, you could serger finish the neckline and simply fold back the narrow edge and topstitch to finish. For this design, however, I needed the turned-back edge to meet the shadow stitching, and to fold back a wider finish along a curve requires you to clip the curves into the finished, serged edge. You could do this, however it leaves raw fabric along the clips and isn’t a very attractive finish.
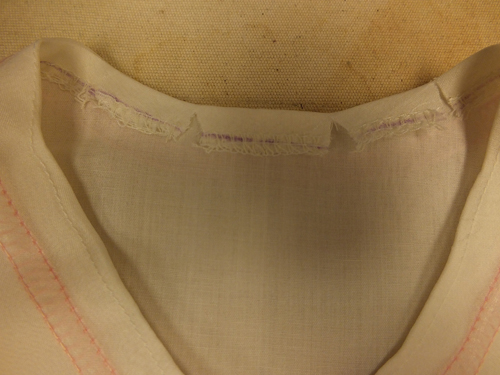
Instead I suggest finishing with a bias strip from the batiste. Cut the strip 1-3/4 inches wide. Fold it in half and press in a circle shape echoing the shape of the your neckline. With the raw edges of the bias aligned with the raw edges of the jacket and working on the right side of the jacket, sew around the neckline with a 1/4-inch seam. Trim the ends of the bias so they overlap the turned-back facing approximately 1 inch. Clip the curves, turn the bias binding to the wrong side, turn the facings to the inside of the jacket (this will also flip the bottom hem up as well) and press around the neck, the hem and down the facings. The bottom hem should meet or be positioned slightly beyond the bottom shadow stitching.
To secure you could hand blind stitch, but it is just as clean and easier to topstitch so that your topstitching lies right beside the shadow stitching line. Use thread to match the garment fabric on the shadow stitching (in this case a fine cream thread). The stitching is barely detectable and you catch the hem on the underside.
The neck bias aligns just beyond the edge of the shadow stitching as well, and you will secure it in the same manner.
Serger finish your sleeve edges, turn up the hem to the shadow-stitching line, press and topstitch as for the jacket. Stitch the sleeve seams aligning the shadow stitching and finish the seam allowance with a serger.
Gather the sleeve cap and set into the garment, finishing with a serged edge. This is a small area to work in, so stitch slowly and carefully.
Add a ribbon closure as instructed in the pattern.
Apply a clear snap on the underlap to secure.
Next week, we will tackle our little drafted bonnet to complete the set.
And on a side note, I actually chatted with Nancy Zieman at Quilt Market in Portland; she was signing copies of her Sew Knits with Confidence book at the F+W booth. And she assured me that my suggesting you catch a skipped stitch with a needle and thread was perfectly acceptable. So we can all relax and forgive our little sewing flaws.
-Amelia http://amigosparasiempre4.blogspot.co.uk


0 komentar:
Posting Komentar