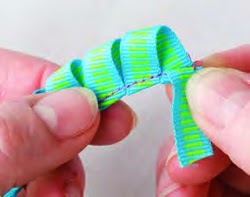
If you'd like to add whimsical embellishments to your next sewing project, Kari Mecca's Whimsy Sticks are just the ticket. These creative tools are used to make playful and precise loops that can be easily transformed into an endless variety of trims and flowers. This simple technique of wrapping ribbons and trims around these "sticks" will have you creating mounds of embellishments for your favorite projects in no time. Discover tips and tricks for using these clever tools and learn how to create a Single Loop Trim and Single Loop Flower in the following excerpt from Kari's book More Sewing With Whimsy.
Made of high quality green acrylic, each Whimsy Stick is a different width for varying sizes of flowers and trims. To use sticks, you will need 1/4- and 1/2-inch-wide rolls of a low tack or basic masking tape. Test tape on trim before using. If tape is too sticky, apply pieces to a smooth surface several times to reduce tack. To make yards of trim, wrap ribbon around stick and apply tape to hold wraps. Remove stick and sew trim according to project. Trim can then be sewn to garments or made into flowers.
Kari's Hints for Success:
• To quickly wrap stick, hold trim out taut and twist stick guiding ribbon as it wraps.
• Wrap trim loosely, leaving 1/8 inch between wraps on narrow trims and up to 1/4 inch on wide trims.
• Do not pull tacking stitches tight, unless instructed.
• Once pinned, view flower from right side and make adjustments, if needed.
• When wrapping, make sure petals (loops) do not “stack.” They should be offset from previous layer.
• If making several flowers, cut looped trim into desired lengths before making flowers (this will ensure you do not run out of trim).
Single Loop Trim:
1. With ribbon right side up, tape end to end of Whimsy Stick labeled "start here" (photo 1).
 |
| Photo 1 |
 |
| Photo 2 |
 |
| Photo 3 |
 |
| Photo 4 |
 |
| Photo 5 |
 |
| Photo 6 |
 |
| Photo 7 |
Single Loop Flower:
Before you begin,
• Make single loop trim (above) using desired ribbon and Whimsy Stick.
• Thread milliners needle with beading thread and knot ends together.
1. Hold trim with stitched edge at bottom and fold end of ribbon down (photo 8).
 |
| Photo 8 |
2. Loosely wrap trim around end two to three times. Cut trim and fold end down when flower is desired size (photo 9).
 |
| Photo 9 |
3. Turn flower upside down and insert pins across flower base to hold. Using hand sewing needle, stitch across entire base of flower making sure to keep tension loose. Repeat several times keeping wraps loose as shown. Knot thread to finish (photo 10).
 |
| Photo 10 |
 |
| Single Loop Flower |
Check out our Sewing Whimsies with Kari Mecca Ultimate Collection for more from Kari Mecca. This kit includes three books (Sewing With Whimsy, More Sewing With Whimsy and Whimsy Flowers & Trims) PLUS three DVDs (Secrets to Stitching Bullion Whimsies, Whimsical Appliqué and Whimsy Flowers & Trims)! The “Whimsy Flowers & Trims” book comes with a sample set of punch-out Whimsy Sticks inside, so you can start creating right away.
Sew On, Sew Well, Sew Beautiful,
Cyndi and Amelia http://amigosparasiempre4.blogspot.co.uk


0 komentar:
Posting Komentar